Phoenix Code Installation Guide
Phoenix Code is a text editor designed to make coding as intuitive and fun as playing a video game — specially crafted for web developers, designers, and students. This guide walks you through downloading and installing Phoenix Code on Windows, macOS, and Linux, or running it straight from your browser with no install at all.
Download
Visit the official website — phcode.io — and click the Download button to grab the installer for your operating system.

Linux users: see Installing on Linux below for the one-line terminal installer.
Choosing a different installer
If you need a build for another operating system, or have specific requirements:
- Click the Download drop-down on the website.
- Select the installer you need from the list.
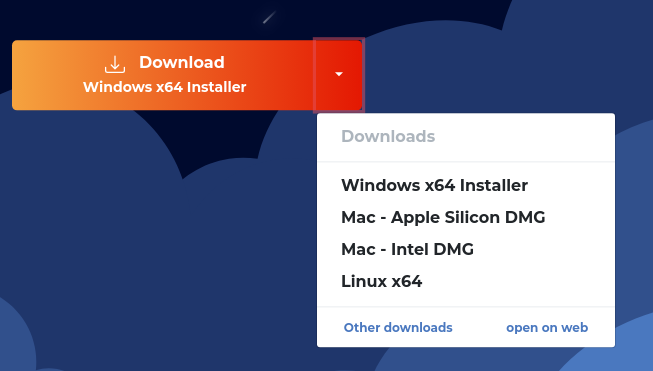
Phoenix Code supports a wide range of operating systems:
- macOS — Apple Silicon (M1+) and Intel chipsets
- Windows — x64 architectures
- Linux — Ubuntu, Debian, Pop!_OS, Fedora, Arch, and more
Install
Windows & macOS
Run the downloaded installer and follow the on-screen instructions. Once it finishes, launch Phoenix Code and you're ready to start building.
Linux
Open a terminal and run the official installer script — copy it from the website or use the command below:
wget -qO- https://updates.phcode.io/linux/installer.sh | bash
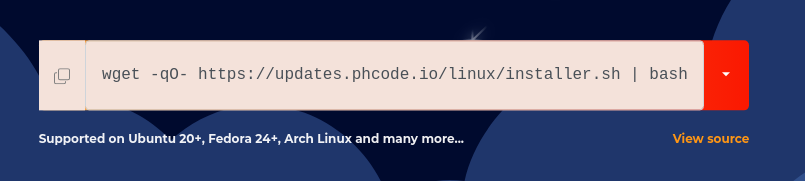
This installs Phoenix Code along with all required dependencies, and sets up app-drawer shortcuts and file associations automatically. It works on all major distributions, including Ubuntu, Debian, Fedora, and Arch-based systems.
Need to install by hand, check dependencies, or uninstall? See Advanced Linux installation below.
Use it in the browser
Prefer not to install anything? Run the full editor right in your browser at phcode.dev — perfect for Chromebooks, tablets, or just trying things out. Everything runs locally in the browser, with nothing to download.
Advanced Linux installation
The one-line installer above is all most users need. The sections below cover manual installation, runtime dependencies, and common questions.
Uninstalling
To remove an automatic installation, run:
wget -qO- https://updates.phcode.io/linux/installer.sh | bash -s -- --uninstall
For a manual installation, delete the folder where you placed the Phoenix Code app, along with any related files.
Manual installation
If automatic installation fails, or you prefer to install by hand:
-
Check your GLIBC version:
ldd --version | awk '/ldd/{print $NF}' -
Download the package: visit the Phoenix Code releases page and download a build compatible with your GLIBC version.
-
Extract it:
tar -xvf phoenix_code_version.tar.gz -
Read the bundled instructions:
cat extracted_folder/ReadMe.txt -
Follow the steps in
ReadMe.txtto complete the installation.
Desktop environment compatibility
Phoenix Code is tested on both GNOME and KDE. Other desktop environments may work via manual installation.
Dependencies
If Phoenix doesn't start after installing, restart your system and confirm the required dependencies for your distribution are installed:
- Ubuntu/Debian
- Fedora/Red Hat
- Arch Linux
Update your package list:
sudo apt update
Install WebKitGTK and GTK:
sudo apt install libgtk-3-0 libwebkit2gtk-4.0-37
Note: In Ubuntu 22+ versions, WebKitGTK may be pre-installed.
Install optional GStreamer plugins for media playback:
sudo apt install gstreamer1.0-plugins-base gstreamer1.0-plugins-good gstreamer1.0-plugins-bad gstreamer1.0-plugins-ugly gstreamer1.0-tools gstreamer1.0-libav
Update your package list:
sudo dnf update
Install WebKitGTK and GTK:
sudo dnf install webkit2gtk3 gtk3
Install optional GStreamer plugins for media playback:
sudo dnf install gstreamer1-plugins-base gstreamer1-plugins-good gstreamer1-plugins-bad-free gstreamer1-plugins-bad-freeworld gstreamer1-plugins-ugly gstreamer1-libav
Ensure your system is up to date:
sudo pacman -Syu
Install WebKitGTK and GTK:
sudo pacman -S webkit2gtk gtk3
Install optional GStreamer plugins for media playback:
sudo pacman -S gst-plugins-base gst-plugins-good gst-plugins-bad gst-plugins-ugly gst-libav
FAQ
How can I verify my distribution is supported?
Run the one-line installer. If it completes successfully, your distribution is supported.
How do I upgrade Phoenix Code?
For automatic installations, you'll get an update notification in the app itself. For manual installations, repeat the manual installation steps.
Phoenix won't start after installing — what can I do?
Restart your system, then confirm the dependencies for your distribution are installed.