Customizing the Editor
This section provides an overview of the editor appearance and display settings in Phoenix Code.
Themes
Phoenix Code ships with two built-in themes:
- Phoenix Dark Neo: default dark theme
- Phoenix Light Neo: default light theme
You can install more themes, create your own, or remove themes you have installed, see Extensions.
Switching the Theme
Open View > Themes... and pick a theme from the Current Theme dropdown. The change applies immediately.

Click Get More... to browse community themes. See Extensions for installation steps.
Use Theme Scrollbars
The Use Theme Scrollbars checkbox controls scrollbar styling.
- On (default): scrollbars use colors from the active theme.
- Off: scrollbars use your operating system's default style.
Font
Phoenix Code uses SourceCodePro as the default editor font. Change the size and family from View > Themes....

Font Size
Type a value into the Font Size field. Accepted units: px (1 to 72) or em (0.1 to 7.2). Decimals work, e.g. 12.5px. The default is 12px.
Keyboard shortcuts to resize the editor text:
| Action | Windows / Linux | macOS |
|---|---|---|
| Increase font size | Ctrl + Shift + + | Cmd + Shift + + |
| Decrease font size | Ctrl + Shift + - | Cmd + Shift + - |
| Restore default | Ctrl + Shift + ( | Cmd + Shift + ( |
The shortcuts above change only the editor text size. To zoom the entire interface at once, use these:
| Action | Windows / Linux | macOS |
|---|---|---|
| Zoom in | Ctrl + + | Cmd + + |
| Zoom out | Ctrl + - | Cmd + - |
The current zoom level is shown next to Zoom In under View > Zoom UI and Fonts.
Font Family
Type a CSS font-family string into the Font Family field. The first available font in the list is used:
'Fira Code', 'JetBrains Mono', monospace
Wrap names containing spaces in single quotes.
The font must be installed on your system. Phoenix Code only bundles
SourceCodePro(the default).
Line Height
The Line Height feature lets you customize the vertical spacing between lines of text in the editor.
Adjusting Line Height
To adjust line height:
- Click on
Viewin the menu bar. - Navigate to the
Themes...option. - Use the Line Height slider to set a value between 1 and 3. The default is 1.5.

Adjustments apply instantly, updating the editor dynamically.
Modifying Line Height via Preferences
You can also modify the line height by updating the themes.editorLineHeight property in the preferences file. Click Here to read on how to edit the preferences.
Scroll Sensitivity
Scroll Sensitivity sets a multiplier for mouse-wheel scroll speed in the editor. Increase it if scrolling feels too slow, decrease it if scrolling feels too fast.
Adjusting Scroll Sensitivity
- Click
Viewin the menu bar. - Select
Themes.... - Use the Scroll Sensitivity slider to set a value between
0.1and10. The default is1(normal speed).

The new value applies immediately.
Modifying Scroll Sensitivity via Preferences
Set the mouseWheelScrollSensitivity property in the preferences file. Accepts any number from 0.1 to 10. Click Here to read on how to edit the preferences.
Indent Guide Lines
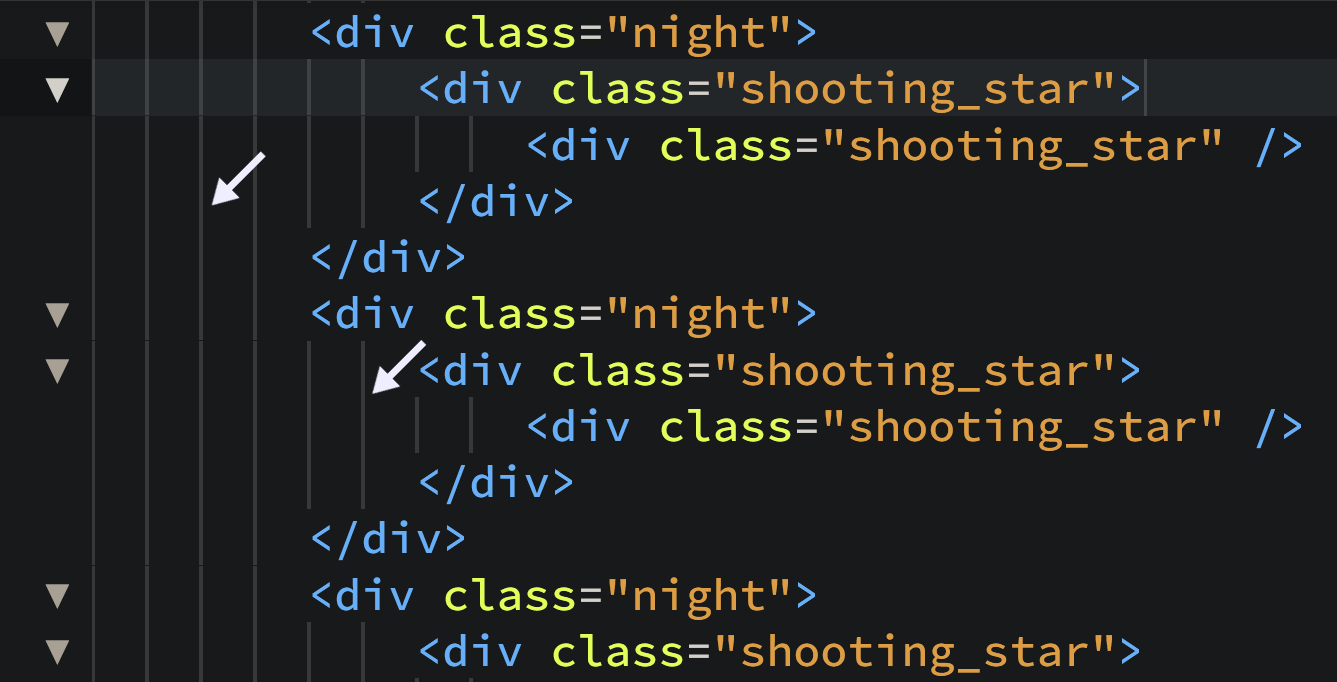 Indent Guide Lines are vertical lines that help visually align code blocks and indicate indentation levels. They assist in understanding code hierarchy and nested structures, improving overall readability.
Enabling/Disabling Indent Guide Lines
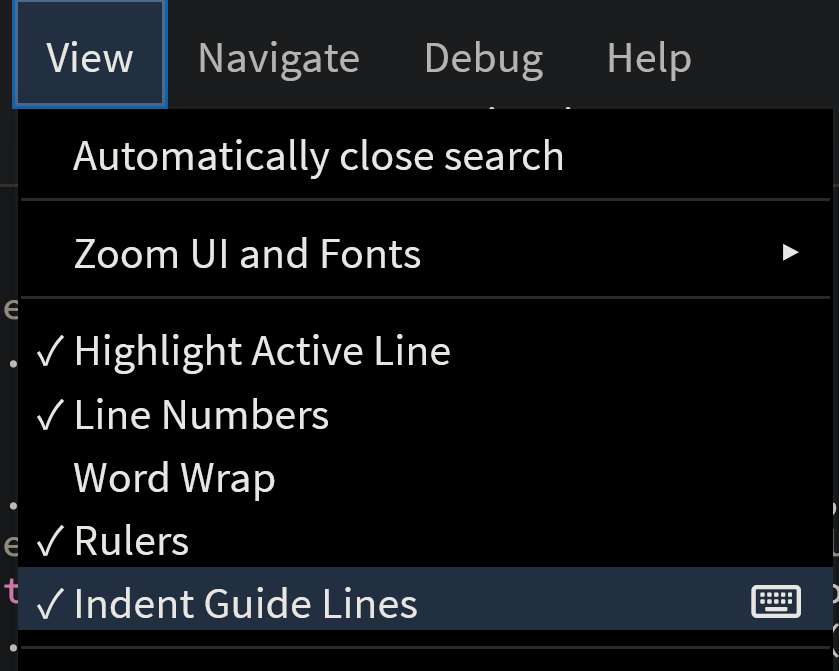
To enable or disable Indent Guide Lines, go to View > Indent Guide Lines.
Editor Preferences for Indent Guides
You can customize indent guide behavior in the editor preferences with the following options:
Click here to read on how to edit the preferences.
editor.indentGuides: Set to true to display indent guide lines; set to false to hide them.
editor.indentHideFirst: Set to true to hide the first indent guide line; set to false to display it.
Editor Rulers
Add vertical column rulers to the editor to keep track of line lengths. By default, a single ruler is set at the 120-character position.
Enabling and Disabling Rulers
Toggle the visibility of rulers through the View > Rulers menu option.
Adding Multiple Rulers
To add multiple rulers, edit the preferences file. Click Here to read on how to edit the preferences.
Add the following entries to the JSON configuration:
{
    // existing json items
    "editor.rulers": [40, 80],
    "editor.rulerColors": ["green", "#f34d5a"],
}
These settings introduce two rulers at the 40th and 80th character positions, colored green and red respectively.
Configuration Options
editor.rulers: Specifies an array of column numbers where vertical rulers will appear.editor.rulerColors: An optional array to set colors for each ruler, corresponding to the positions listed ineditor.rulers.
Q: How do I add different rulers for each project?
To set up different rulers for individual projects, create a .phcode.json file
in the root directory of each project. Include the same ruler configurations as
shown in the example above.
No-Distractions Mode
No-Distractions Mode helps you focus by minimizing visual clutter and hiding non-essential interface elements, creating a clean, minimalist editing environment.
Activating No-Distractions Mode
Using Editor Interface :
Toggle between No-Distractions Mode and Normal Mode through View > Menu option.
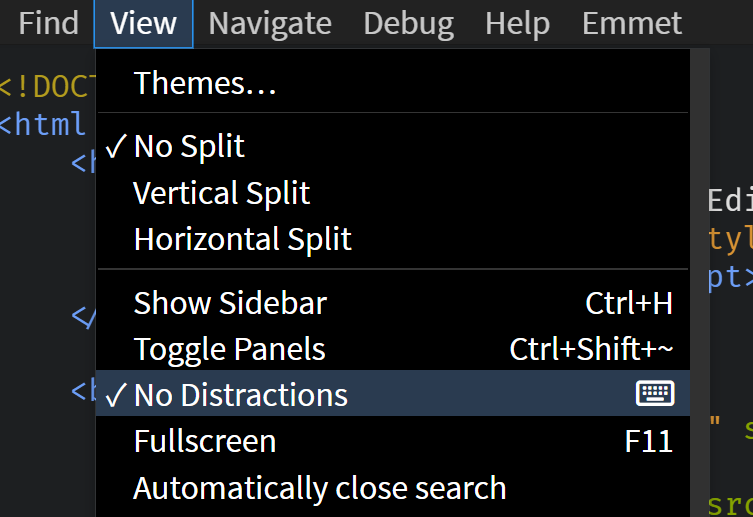
Using Keyboard :
Press Shift + F11 to toggle between No-Distractions Mode and Normal Mode.